Showing posts with label DIY. Show all posts

Thursday, January 31, 2013

Adventures in shoe organization

Remember when my water heater blew up a couple weeks ago? 
And remember when I was trying to organize my life? 
Remember how much I love shoes?
 
Well, those things collided.  Gene's not thrilled about it, but too bad.
 
 
We installed our new water heater.  Well, I say "we" in the sense of "Gene".  Gene installed our new water heater.  Can I get a "Hell Yeah!" for handy men?  Can I get another "Hell Yeah!" for clean feet?
 
In the processe of that happening, the "door" that was on the closet that held the water heater was shot.  Now when I call it a door, it's only a door in the sense that it covered a hole and nothing better than that.  It was a couple pieces of crappy drywall screwed to some plywood.
 
Know what happens when that gets wet? 
yeah... it's really gross.
 
So in the middle of my master closet is a gaping hole with a shiny new water heater in it.  I still think that the person that designed this concept was a raging moron, but when your feet are dirty (you don't want to know what I was standing in) you'll take what you can get.
 
So I'd had this idea for a while for that space in front of the water heater anyway and since I'd had to do a mass exodus of everything in the bottom of my closet (which was a lot for the record) I decided now was as good of time as any.
 
I proclaimed "we shall build a shoe rack"
 
And Gene moaned.


So last weekend we went to the lumber yard, bought some pre painted shelves (because it was cheap and easy) and cut them into 2' lengths.


He's so bubbly and estatic can you tell?


It was pretty simple at this point.  We just screwed through the sides to attach the shelves.  Since you can't really see the sides, I didn't worry about the screw heads.  If I were in a situation where the sides would be seen, I would probably either counter sink them and fill the holes, or possibly I'd attach the shelves from the inside.
 

I bought a thin piece of plywood to cover the back of it.  Originally I was going to just paint it white, but as I went to get the paint, I saw my pretty turquoise blue paint that I loovvvvvve and changed my mind.
 

The next morning, Gene screwed the plywood to the back and we pushed it in place in front of the door.  Easy peasy! 
 
No really, anyone can do this.  All you really need is a drill.  Want the boards cut?  Most lumber yards will cut boards down to length for you for a little bit for each cut.  If you bat your eyelashes and stick out your boobies, maybe even less than that.
 
Having said that, they never give me a deal on cutting a board for me.
 
I guess I shouldn't expect them to do that for Gene when he sticks out his boobies.
 
Just add shoes, and pixie dust and music falls around you.  LOVE my new shoe rack.  It's so much neater around the house now (I really didn't have a lot of places to put shoes.
 
We also removed the closet door as I realized we never shut the thing and it takes up real estate.  Someday when we remodel, I'll be putting a barn door hardware on a slide across that door anyway.
 
Tangent:  Dearest Torrie.  I love you.  Do you want this damn door cuz I'm fixing to throw a match on it.  I love you.  Lana
 
So if you want to make your own shoe rack, don't be scared.  Buy a drill, get hex head bits/screws (smartest thing ever).  Organize your shoes.  Be happy.
Ignore husband.
 
The end.

Tuesday, August 21, 2012

Busy as bees

Time for another porch update already?

Yep!


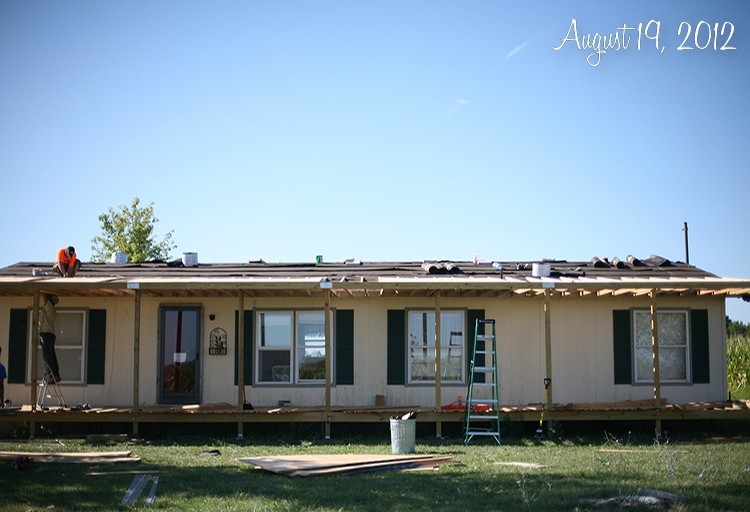
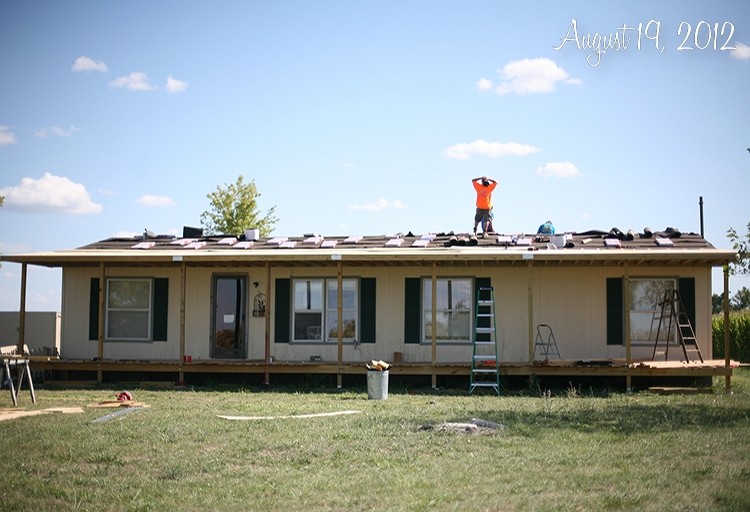
Let's just say a lot of things happened over the weekend.  We hired a small crew (and Tanner) to come out and help us do the hard stuff.  I can NOT go on the roof.  I'm scared of heights, and ladders, and about barf when I'm in the sun too long.

So pretty much, I'd be air lifted off my roof. 

I think that'd break into my budget a bit.

Anyway, you can see the progress below, and see that we made some good headway.  You can really get an idea of how it might look when it's done now!

08-22-house1
Plywood makes for great shade!


08-22-house2
Shingles heaved up there.  I didn't have to do that.  *happy face*


08-22-house3
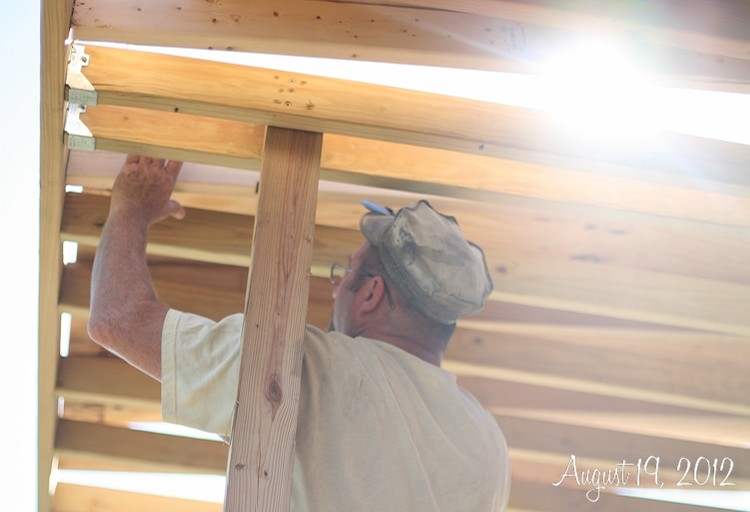
Doing something uninteresting in pretty sunflare.


08-22-house4
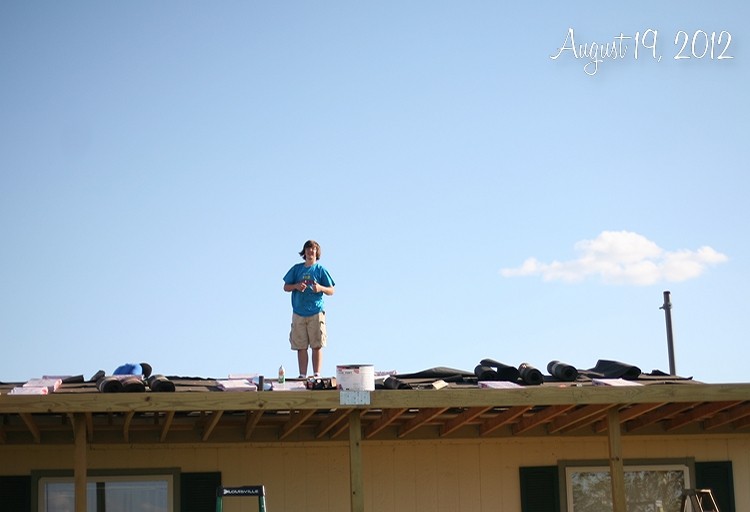
Tanner is excited (lie) about roofing.  A skill that will put him through college!


08-22-house5
Tired boys!


08-22-house7
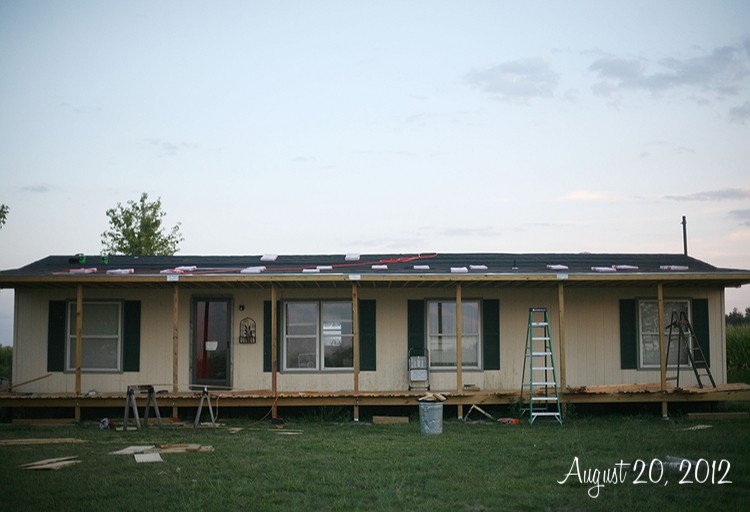
Look at that!  Porch roof is covered, has tar paper, drip rails and is almost ready for shingles.  Back side is completely shingled.  I did a lot of decking (around 25% of the length.  It's VERY LONG).

Lots left to do, but I'm already thinking about my porch swing and breakfast on the porch.

Thursday, August 16, 2012

Hi Ho a decking we will go

08-15-deck1

Time once again, for a deck update. 

I know you've been sitting there with baited breath wondering how it was going. 

We had a break in there because of the Colorado trip, but we're making some good headway now. Especially since the weather has decided to cut us a little slack.

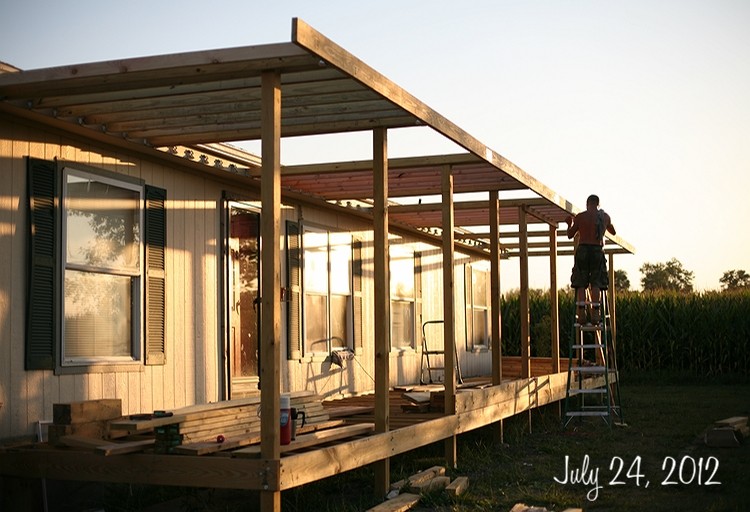
Above, Gene is putting in the ceiling joists.  It's not very exciting work, but it really makes it start feel like a porch.  Sadly it feels a little like a pergola still, but we're getting there.

08-15-deck2
A lot of things happened in here that look like exactly nothing (some joist supports that took FOREVER (lucky me cut every single one.  At least 15% of them twice!  sigh).  No point in taking photos of that, because it looked kind of the same.

However, once we started cutting the decking and laying it down, thinks started to change rapidly!

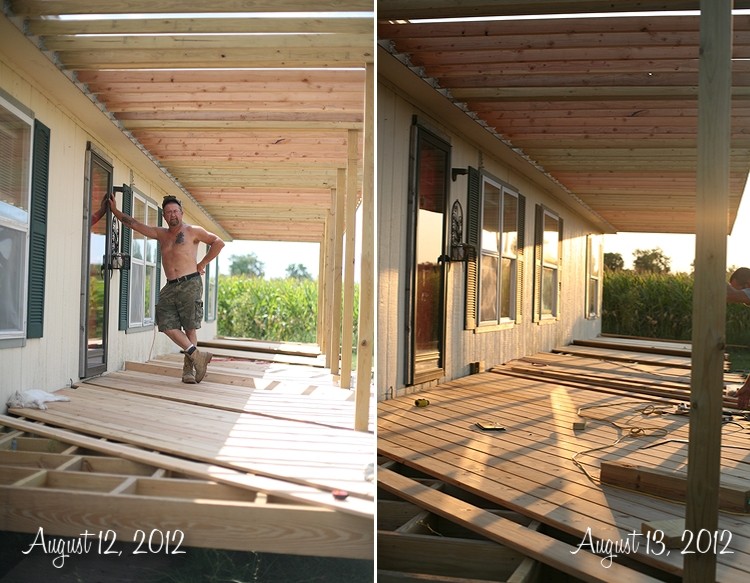
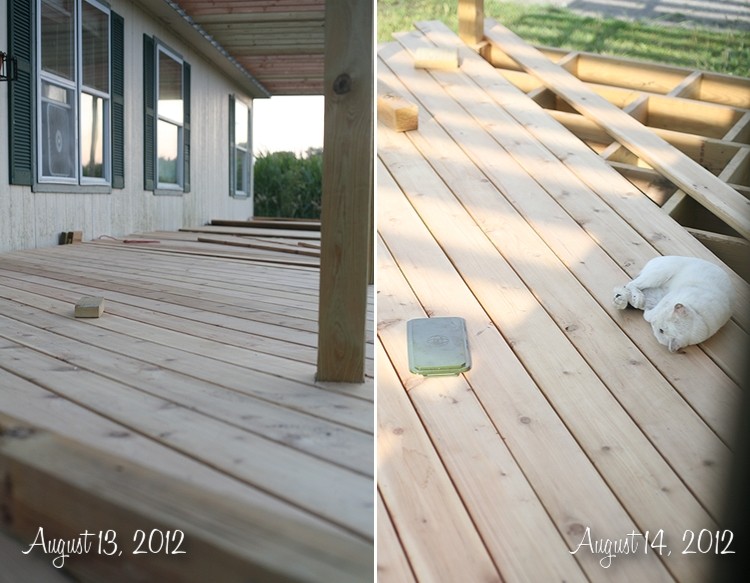
We decided to go with cedar decking.  Let me tell you, it smells great every time I open my windows!  We're also running it diagonally.  Running it parallel to the house meant there'd be seams, and running it perpendicular would have made a huge commitment of the joists in the opposite direction. 

I, being difficult, decided that diagonal would be the best route to go.

BTW, did I mention that means more money? Yeah.

08-15-deck3
Here you can see how nice it looks all laid out.  Cutting around those posts are a real bugger.  It's not as easy as it looks.

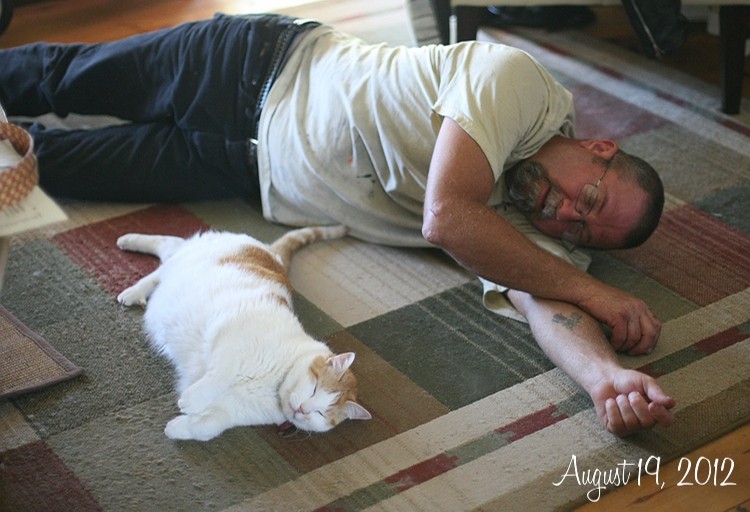
This is boo's new happy place.  He lays out there about every day begging to come in at some point.  I open my front door and he just sits and stares in the storm door.

08-15-deck4

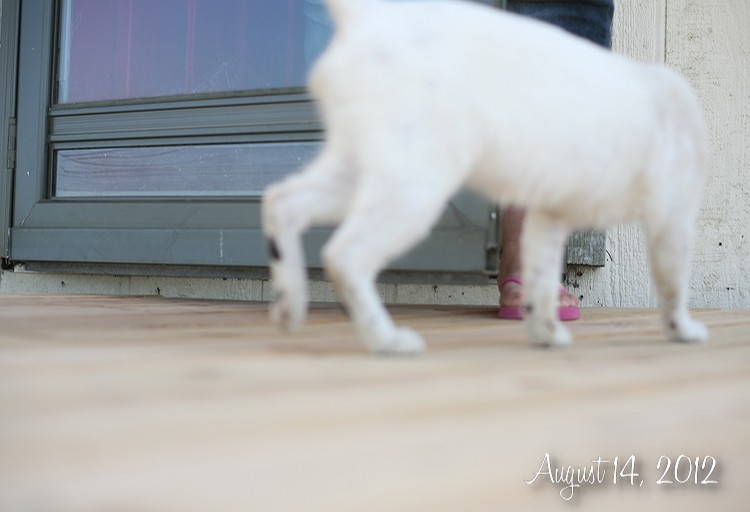
And here's me, doing something I've not been able to do in 3 years.  Going through my front door!  However, this is also Boo, trying to do something he's wanted to do for 3 months. 

Also go through the front door.
FAIL.

I'm slowly working on Gene though.  Someday, Boo Kitty, you'll be curled up on the glass man's side of the bed.
He might be dead when it happens, but it WILL HAPPEN.

Friday, July 13, 2012

The porch that never was!

I thought I should take a moment and give you an update on the never ending porch project.  It's going, but it's going slow.  It's been painfully hot here and it's hard to go outside and work when it's 100 degrees at 7 p.m.  WITH Missouri humidity.  I find that even on coolish days, I have to stand in the shade if it's not imperative that I'm needed.  I've always been this way - no worries. 

If I'm hot, I look like I'm about to stroke out.  So if you see me beet faced, just say hello and move on. I'm not stroking out (yet).


This, my friend, is what $2,000 looks like.  Well, most of $2k there were a few more stacks later.  That's $800 more than when we shingled it 5 years ago.  Hmmfpt.  Next shingling job will be done by a bunch of illegals trucked in after a hail storm.  We're NOT doing it again.


It was hot, but we managed to get the last section up on the 4th.  There was a lot of cussing as we realized some of our 4x4's had twisted.  Effing treated lumber.  It's a pain to work with.


It doesn't look like a lot more, but here you can see all the support ceiling joists are up.  That was an all day project.  Gene did most of the hard stuff.  This was a "stand in the shade" kind of day. :/


Work was slow so they sent Gene home 3 hours early.  No, he's not very happy about it either.  He came home and cut the tops off of the posts on the front and put in joist hangers.  Joist hangers are the metal brackets that support the weight of the joists.  They also help the joist to not twist.  If you're building a deck, for safety reasons, you really should have joist hangers.  You don't want to have a party with 40 of your closet friends and have your deck collapse.  YIKES.   Even though it's not required for the short width of the deck (8 feet) we are still adding extra support joists down the center to help keep the lumber straight and keep it from twisting.


Boo kitty says "heyyyyyyy girlfriend".


You can see the tops of the posts are gone now.  YAY.  I hated those up there.  They looked raggedy and hodge podge like we didn't know what we're doing.

We don't know what we're doing but no need to announce it or anything.


You can see better from here that all the joists are installed in the floor.  That was a big project. We found out that since we're running our decking diagonally, we have to put our joists closer together.  This means more wood.  The place we've been buying wood was out of what we needed, this is when we realized that there was WAY BETTER wood at another lumber yard (Bearcat Lumber fyi) for about .06 more. 

*heavy sighs*

Live and learn.

Every project we do has been a learning process for us.   I'm sure it's not 100% perfect (I know it's not!) but what I do know is that whe it's done, it will look nice and will add value to our home.  If it means that it's only 89% as good as it should be, then I say a B+ is still pretty damn good and I'll take it.

Can I hear a "hell yeah" for a B+?

Thursday, May 17, 2012

Garage sale haul!

A couple weekends ago, it was Maryville's (my town) city wide garage sale day. As a certified bargain shopper AND an antique dealer, this is more fun than Black Friday. (I had to capitalize "Black Friday" since it's a national holiday and all.)

You should have seen my jeep. (I drive a 2 door wrangler). I'm fairly confident that I looked like a Clampett with all my treasures.

I thought it'd be kind of fun to show you my goodies, and my plans for them.  P&L statement at the end of this post. ha!
05-08-garagesales
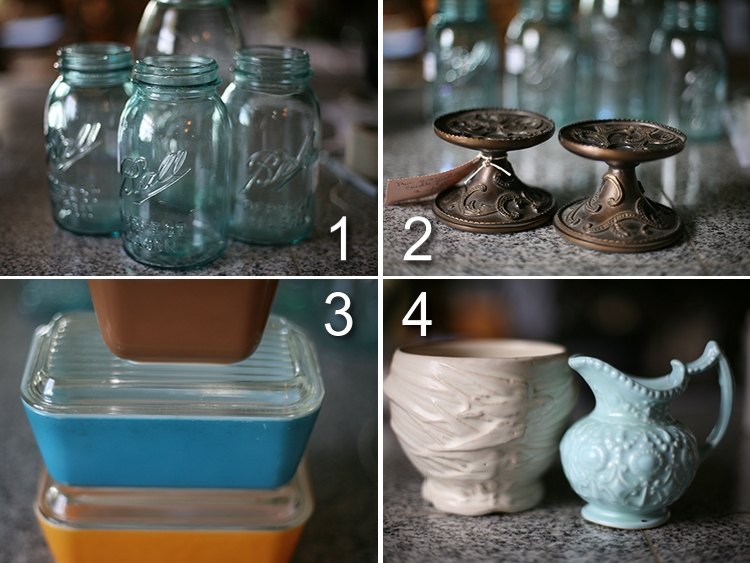
1.  Blue jars.  I buy them every time I see them (if they are under a couple bucks).  I can turn them over hand over fist if I mark them a fair enough price - which is in the $4-5 range.
Paid -$4.00 for 4. 
Sell - $20.00

2. Decorative Candle holders - decorative pieces like this go well - again, got to mark them cheaper than what they'd ever get them for in the store.  These are new, but they look "old".
Paid -$.50
Sell - $5.00

3. Vintage pyrex refrigerator ware - becoming popular again.  History's answer to tupperware.  I keep thinking I should use this myself, but it's nice to spend the $ instead.
Paid - $3.00 for 3
Sell - $18.00

4. Glazed stoneware.  The one on the right I paid $1.00 for.  I love the look of glazed stoneware pottery like McCoy.  (I can't remember the name of this company though).  The planter on the left, I actually saw in an antique store and looked at it for the longest time.  I almost bought it on sale for $18.00.  I didn't buy it.  Good thing because I found this one for $.50
Paid - $1.50
Sell - $5.00 - because the planter stays here.

05-08-garagesales2
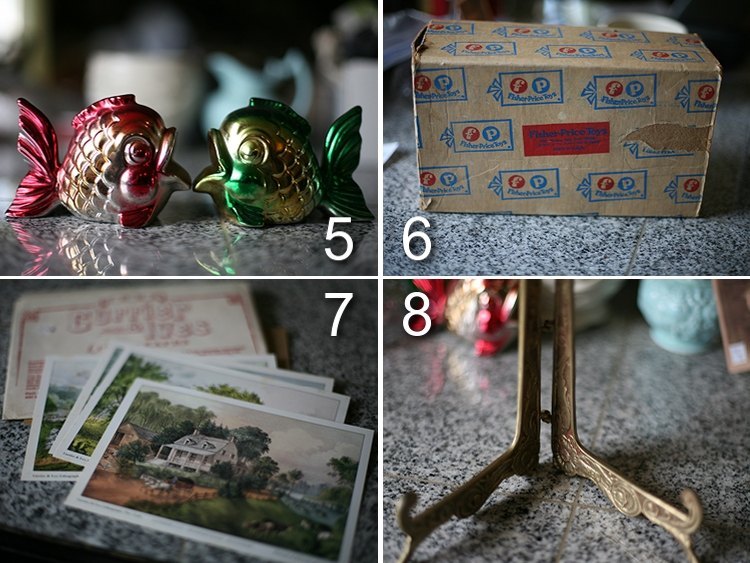
5.  Kitschy kissing fish from 1950's Japan.  I love this sort of stuff, I'm in love with kitsch but I try not to have too much of it around!
Paid - $.50
Sell - $6.00

6. Empty original fisher price box for a trailblazer set.  I used to have a friend into FP, so I knew it was highly collectible.  Findinging an original box, to go with someone's complete set will increase the value of their collectible quite a bit.  This will go on ebay.  They were wanting $1.00 but when I asked him if he'd take less, I ended up paying a quarter.
Paid - $.25
Sell - $10.00

7. Set of small Currier and Ives lithograph prints in an envelope.  Not something I normally would buy, but I see potential profit.
Buy - $.50
Sell - $5.00

8.  Brass Easel.  Nice deep easel, harder to find.  Marked korea - very pretty.  Probably should have marked it more, I already sold it.
Buy - .50
Sell - $4.00


05-08-garagesales3

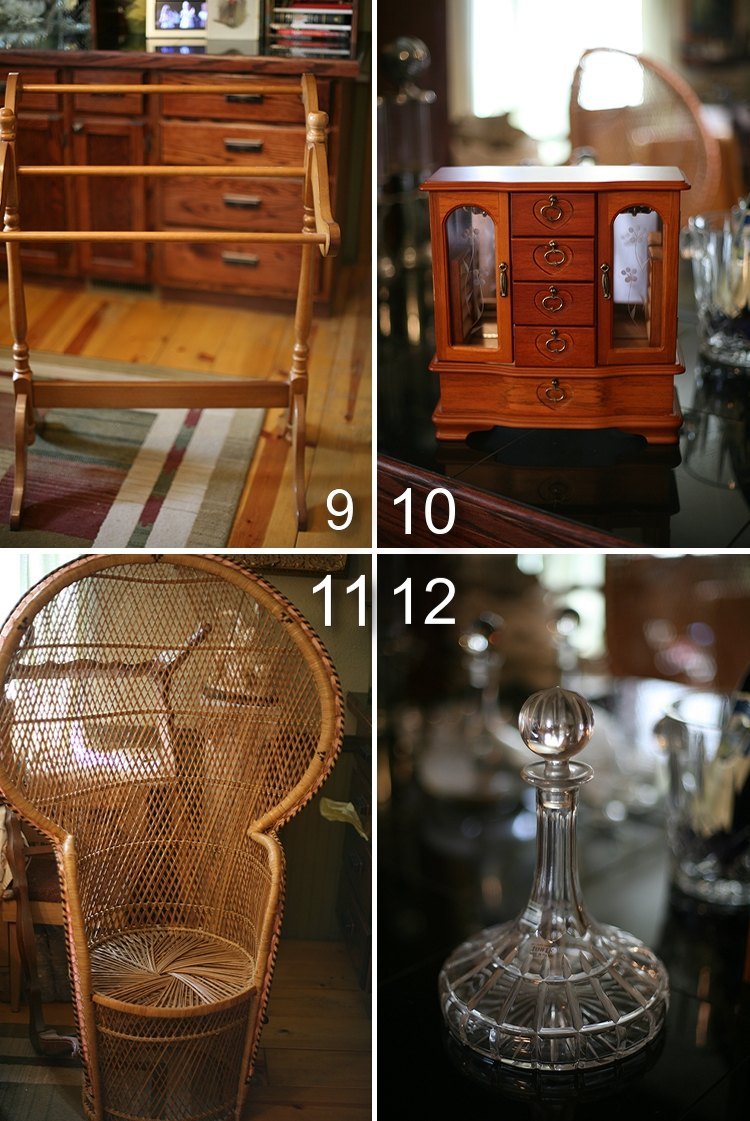
9.  A quilt rack.  I original bought this to put in my booth, but then I remembered that my sister Amber had been looking for one a couple years ago.  I asked her if she still needed one and she said yes so it's now hers. 
Paid - $3.00
Sell - $0.00

10. Jewelry box.  Have you priced jewelry boxes lately?  They are RIDICULOUSLY expensive.  I know this because I wanted to buy one for each of Gene's granddaughters since they had no place to keep their jewelry.  Expect to spend $20 on a cardboard jewelrybox.  So imagine my excitement when I found this one for $2.00  It's in mint condition.  I'll be giving it to Gene's youngest granddaughter Bailey for either her birthday or Christmas.  Probably with a pretty piece of jewelry in it.
Paid - $2.00
Sell - $0.00

11. Rattan chair.  Remember senior photos from 1983?  Yeah, rattan was the shit back then.  Ironically, it's still kind of shit now.  A year ago I declared that I would find a rattan chair and rock it out on my next senior girl.  Took me a whole year to find one.  I'll use it a few times and then resell it.
Paid - $5.00
Sell - $0.00 (for now)

12.  Lead crystal decanter.  Bought this because I thought Gene might like it.  He loves crystal and we have a really pretty bar we built.  We already have a couple decanters on it (including one I surprised him with for Christmas) so he turned it down.  Quick trip through the dishwasher and it was ready to sell.
Paid - $2.50
Sell  - $17.50
05-08-garagesales4

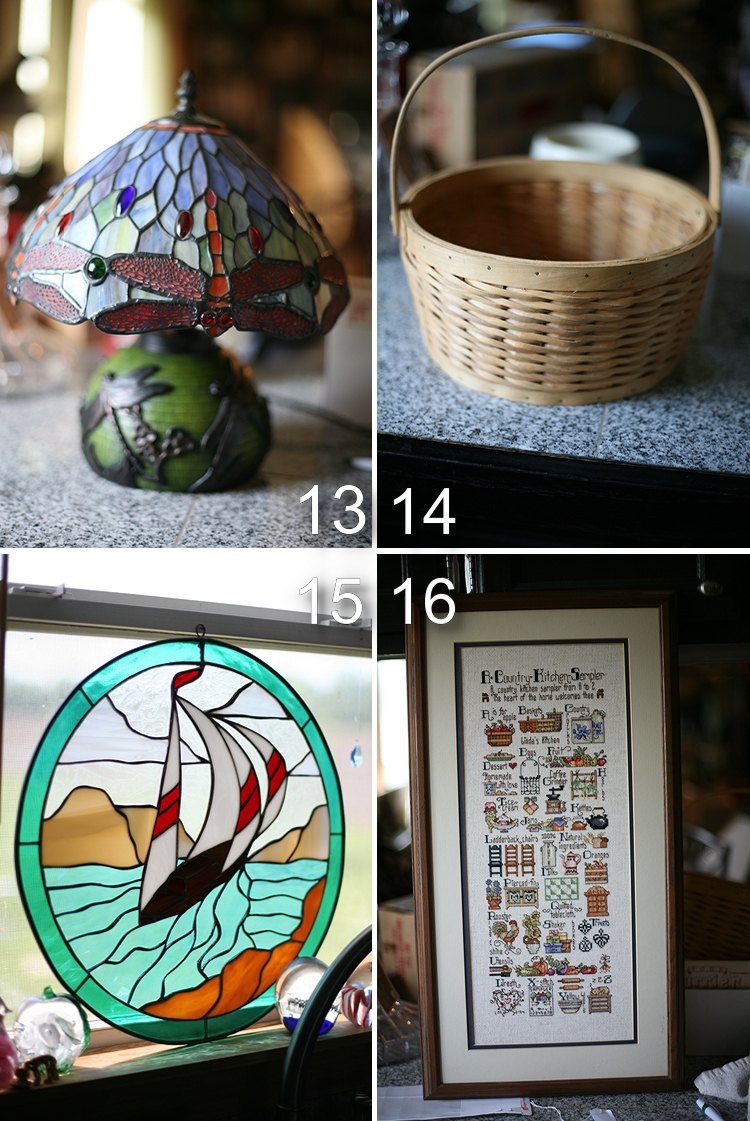
13.  I ran into my mom at a garage sale, she told me of one that she was waiting on in a nicer part of town.  About 15 min before they opened, I showed up there and there was a line outside of people waiting.  Since I'm not THAT dedicated, I sat in my car and waited for the rush after the doors opened.  When I made it inside, I found my lawyer lived there.  I also found this lamp.  It needs a tiny bit of work to make it happen, but what a bargain.  I texted my mom (who wasn't there) and told her what she missed out on.  She loves dragonflies and stained glass.  booyah.  The grasshopper passes the baton.
Paid $5.00 - I will invest about $10 more to fix the broken bit.
Sell - $50.00

14. Basket.  I don't just buy any old basket.  I want cute baskets that are more wooden and less rattan.  Better quality.
Paid $.50
Sell $3.75

15. Sail boat stain glassed piece.  Very pretty, pretty specific genre but the right person will love it.  Sometimes it pays off to show up too early to a garage sale.  I was 20 minutes early - it was a mad house.  I missed out on a bunch of good stuff not being aggressive enough.  Note to self: more elbows... less eye contact.
Paid $7.50
Sell $33.00

16. Cross stitched kitchen piece.  A little harder to sell, but very well done, and professionally framed.  I want this piece to move quickly so I priced it to sell.
Paid $1.00
Sell $13.00
05-08-garagesales5

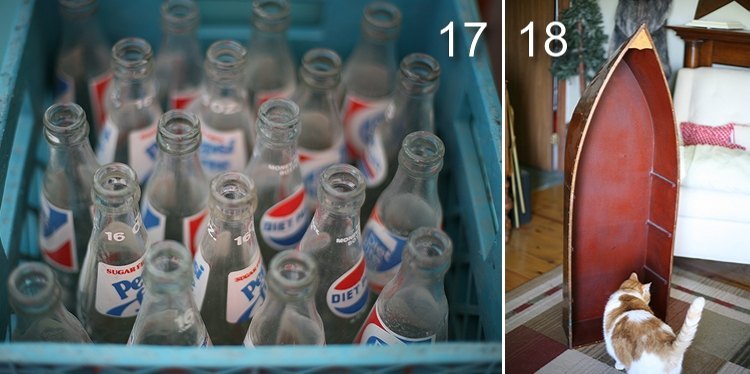
17. A crate of old pepsi and diet pepsi bottles.  He was using them to bottle his own beer.  He had a bunch more he offered up, but I didn't know how well they would sell.  I love how they look sitting in the blue crate.  At the moment, they are sitting on my deck under my blue bench.
Paid - $5.00
Sell - $23.75 ($1.25 ea)

18. Canoe shelf.  There are always a lot of unlisted garage sales skyping off the neighbor's listing.  Sketchy if you ask me, but you do what you gotta do.  After I bought the lamp from the lawyer, I saw another garage sale across the yard.  I walked in, and before I even got to it, I said "I'm taking that".  Canoe shelves are pretty cool.  This is a reproduction obviously, but a bargain at $5.00  Original intention was to sell, but it will probably end up in my own bathroom holding towels as it kind of goes with the "theme" I have going on in my house, which is "rustic boaty cowboy meets renaissance art" 

Haven't you heard? it's all the rage.
Paid $5.00
Sell $0.00


Total investment?  $42.75
Potential profit? $214.00

Plus I get a bunch of stuff for essentially free after I sell a few pieces.

Sometimes I know this makes people angry, so I never say I'm buying to resell.  Why, I'll never understand.  You DO understand that Wal-mart makes a profit right?  Buy low, sell high... kind of what America is all about.

But also keep in mind I have expenses like booth rent, and commissions, so even if I sold every single one of those things, I'd still be in the hole for the month!  Yikes.

We recently moved stores (by force, our store moved and didn't have room for all of us).  I've decided that this is the LAST TIME I'm moving.  If I don't make a go of it there, I'm out for good.

Which means... a kick ASS garage sale at my house next year.
(underwhelming "yay")

Wednesday, July 6, 2011

Trash to Treasure - Lawn furniture

A couple months ago, Gene painted our deck. In the process it was all cleaned off and I told him it would look really nice if we put some furniture on it.

Rather than go to the store and buy a set, I decided to just wait and see if I could find something decent at a garage sale. Literally, a few days later, I pull up to a sale and they had FOUR patio chairs, without cushions, otherwise great condition for three whole dollars.

Three dollars!

I'm in!

I knew that the most expensive part was going to be finding cushions for them, but I knew also, that if I waited, something would fall into my lap. A week later, it did! Here's how I fixed them up into something super comfy and kinda cute for my yard.


07-06-trash1

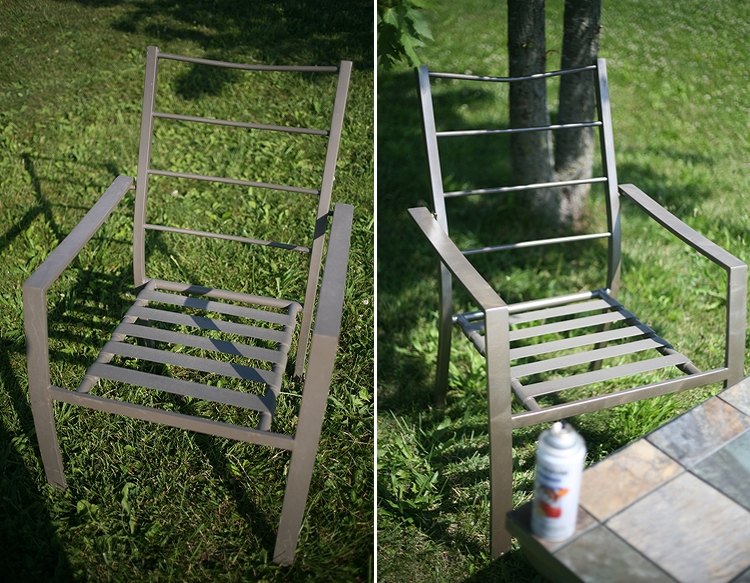
Left: We started with our basic patio chair, nothing fancy, but in super condition and sturdy.
Right: I bought 3 cans of spraypaint (krylon hammer finish) and painted them, pretty much exactly the same color. haha. I really stewed over the color too. In the end it was a good thing because I didn't have to worry about being perfect with the paint. You can see it's a slightly different sheen.


07-06-trash1a

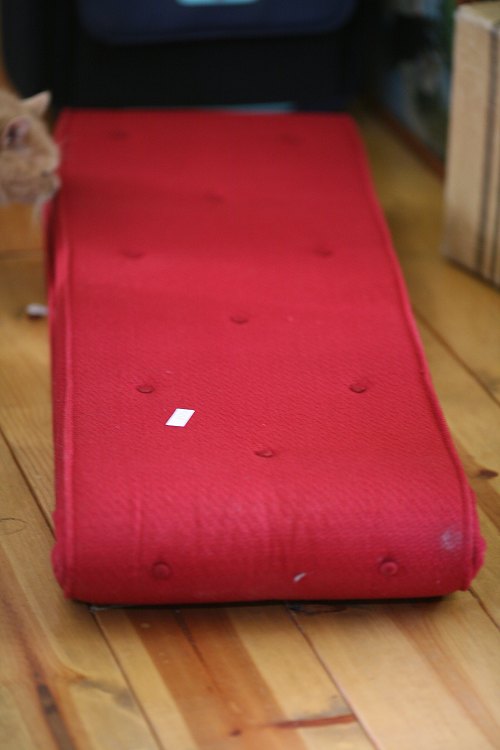
Know what this is? Take a wild guess. This is the cushions I found at a garage sale. I knew I'd have to alter it, but it might just work!

Figured it out yet?

It's a church pew cushion! That's not blasphemy is it? It's not like I stole it, I paid the church in their garage sale for it. hah.


07-06-trash2

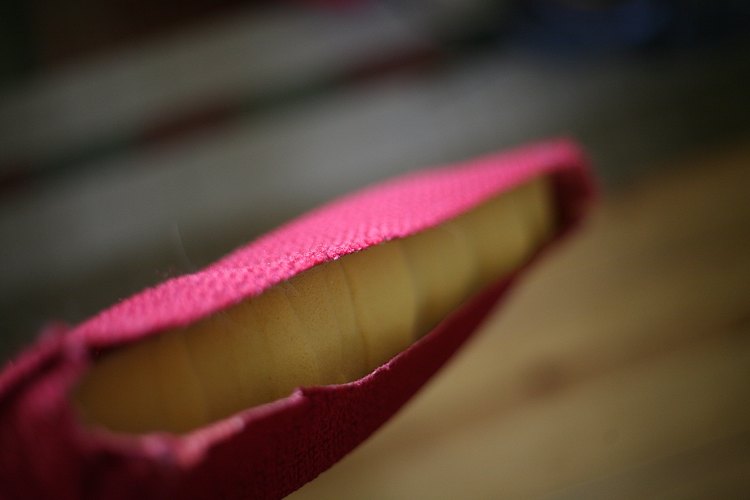
One cushion was just long enough for 2 chairs, so I had to cut them in half. Not as hard as you might think, I'm not a perfectionist. I just folded it in half and cut on the fold. I then went back and cut back the inner padding approximately 2 inches to make room for the folds at the end.


07-06-trash3

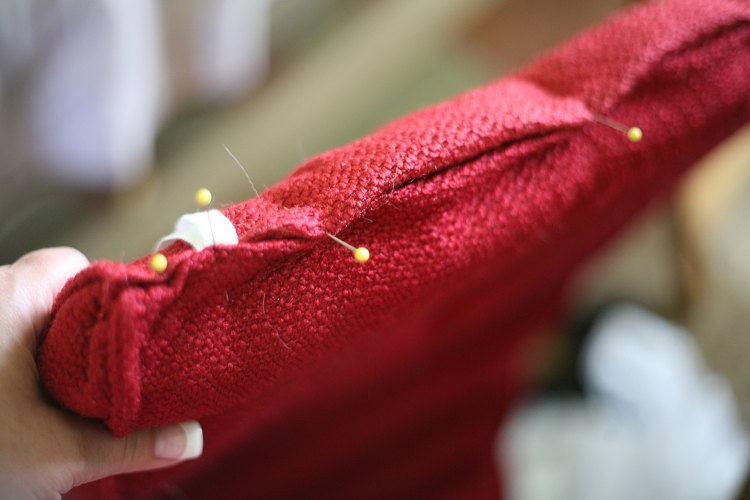
I then folded over the raw edges 1/4" and pinned them together. The ends were carefully folded in, and the tie was added before sewing. It was difficult to sew across the open end as we're talking 4 layers of upholstery fabric.

I broke two needles and I'm not done yet! arg.


07-06-trash4

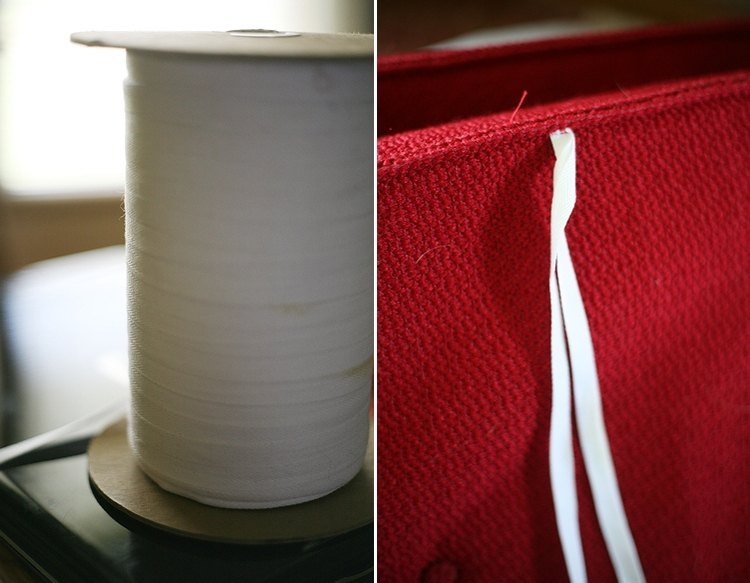
Left: This is what I used for ties. I used to sell twill tape in my scrapbooking business and this is left over. It would be better if it was red, but it was FREE so that makes it awesome. Plus it's much sturdier than plain ribbon.
Right: Approximately 23" from the top, I tacked 2 additional ribbons to tie to the bottom of the seat.


07-06-trash5


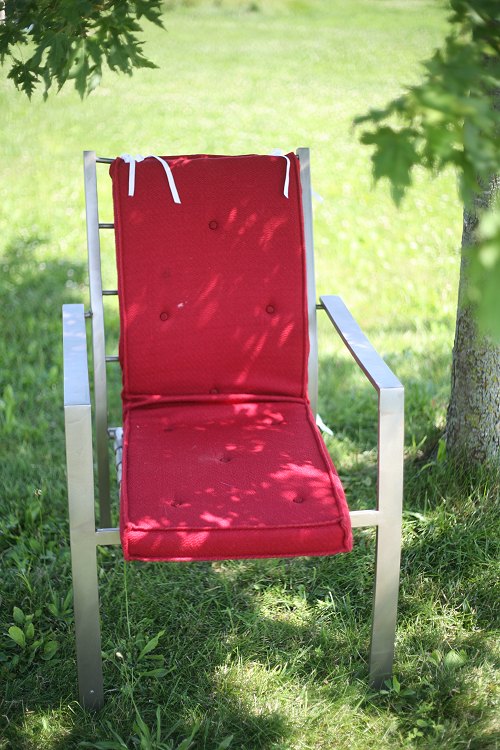
DONE!
Ok, maybe slightly ghetto, I wanted to sew across the fold but it was way too thick. In the end it saved me hundreds of dollars AND it's comfortable, so that's what matters most.

Difficulty: intermediate. You should know how to sew by hand very well, or have a machine. Otherwise all straight line sewing.

$3.00 - 4 chairs
$10.00 - 3 cans of spray paint
$1.00 (yes really) 2 church pew cushions
$0.00 - twill tape

Total cost for new set of patio furniture:
$14.00

A week later, Gene found a nice coffee table with a slate top, metal legs and we added that for a complete set. It's fun, and easily cleanable when the chickens poop on it. :/ That was $20.00, so $34.00 for a complete set.

So excited! My first "official" trash to treasure ;)
More soon! I have 2-3 projects in the works.

Please share your links to your favorite trash-redo.
Related Posts with Thumbnails