Showing posts with label trash to treasure. Show all posts

Friday, September 14, 2012

These shoes were NOT made for walking

I haven't done a trash to treasure for a long time!!  I've not had anything cool to trash... I mean... treasure up. ;)

A few days ago, Gene and I drove to Wathena, KS and had our photos taken by the wonderful Laura Benitz.  When we got married, we didn't spend a lot on wedding photography, and while I'm not complaining because I knew what we were getting into, I am disappointed that I didn't ask for more portraits.  (I promise to share when we see them)
 
While trying to design our own album, I keep getting stuck because I don't have everything I really need to finish the album.
 
I've always wanted a pair of hand painted shoes, but they are pretty expensive.  Plus, even if I was willing to spend the money, the wait time for a pair was over a year.  I decided, "Hey I can paint!"
 
And it was all down hill from there.
 
09-13-shoes1
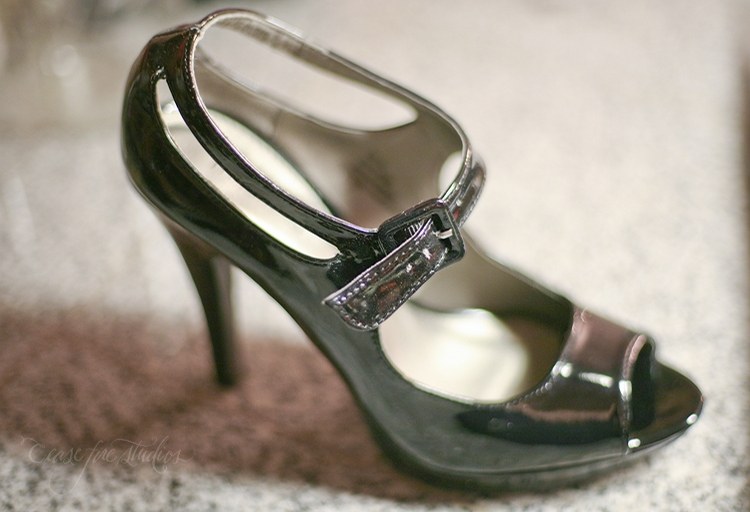
I wanted a pair of white heels, but they seem almost impossible to find!  REALLY!  The best I could find was this black patent pair at Maurices for a grand total of $7.

I put on my thinking cap, and realized I could probably paint over the black and make white shoes.  If it didn't work, I'd be out a grand total of $7.00 and my time.
 
09-13-shoes2

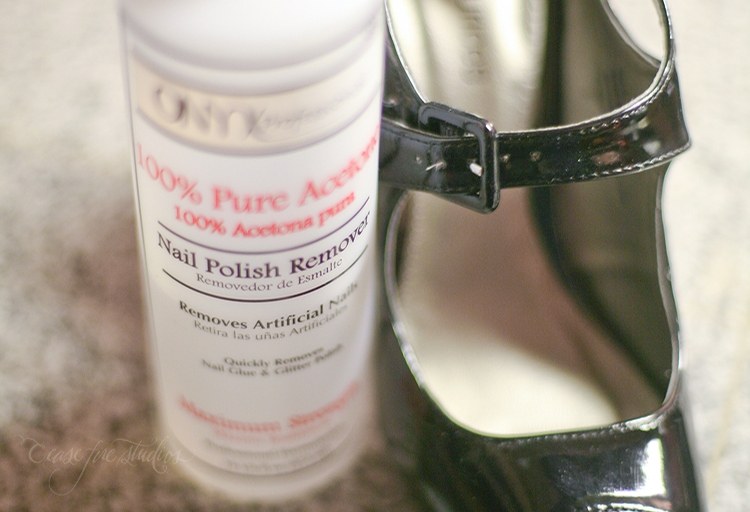
I started by putting some 100% acetone on a paper towel and trying to rub off the shininess of the leather.  It pretty much worked, it didn't take off as much as I thought, but it did take the sheen off.  I use this to take off my acrylic nails, so I already had some on hand.  If you don't, it only costs $3.00 for a huge bottle that will probably last a pretty long time.  No worries, acetone is Y3K compliant. :p


09-13-shoes3
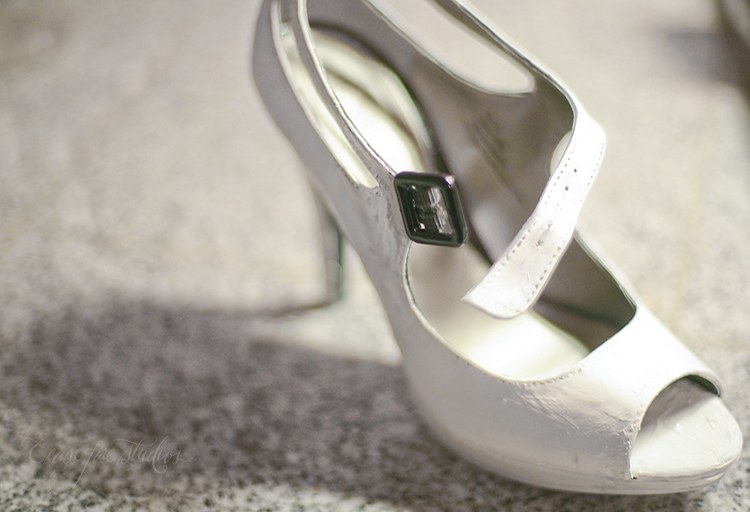
I then painted 2 coats of Gesso over the shoes.  I think my Gesso is a bit on the thick side, so it wasn't perfectly smooth, but I wasn't too worried about it.  $7.00 right?

09-13-shoes4
I then pulled out some supplies out of my craft room.
 
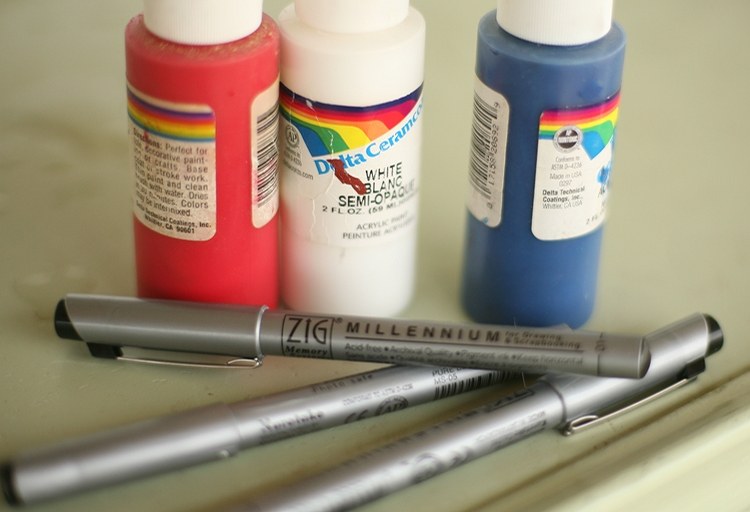
Zig Millennium Pens - that I use when I paint sometimes
Delta Ceramcoat Paint - that I've had, I'm not kidding, around 20 years.  It's still good!!
 
I painted over the Gesso a coat of white acrylic paint.  You could use another brand if you like, I always liked ceramcoat because it was thick and good coverage.
 
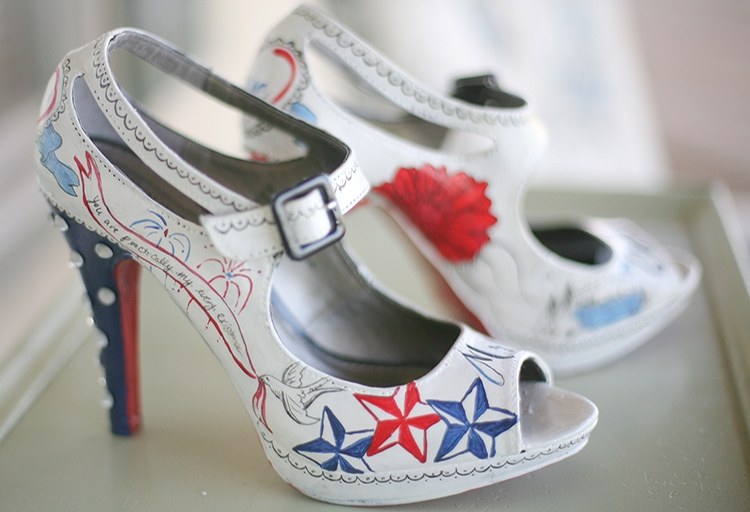
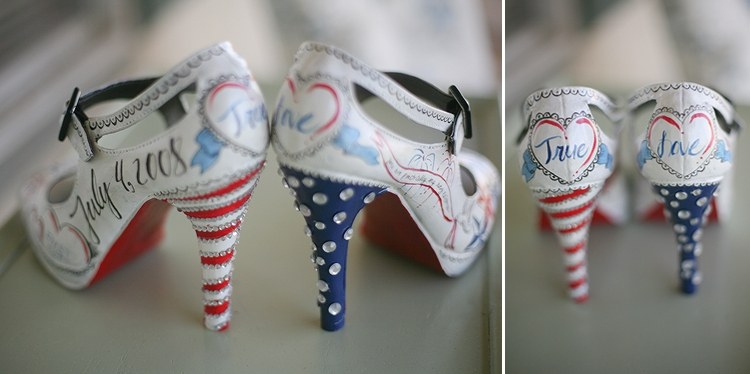
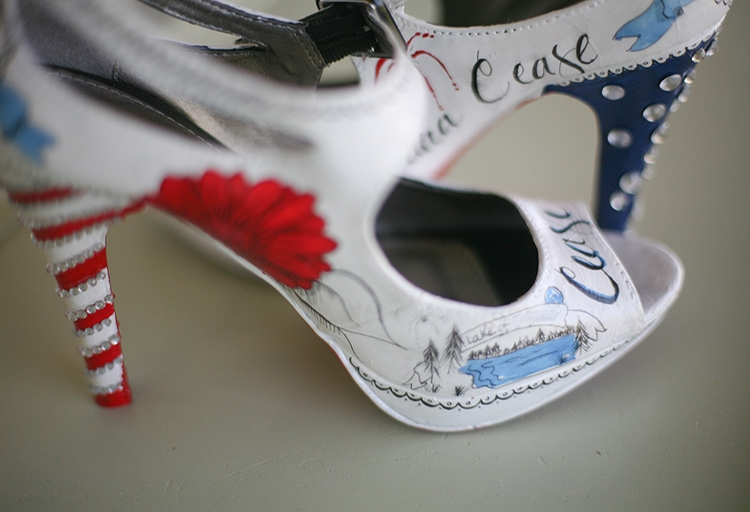
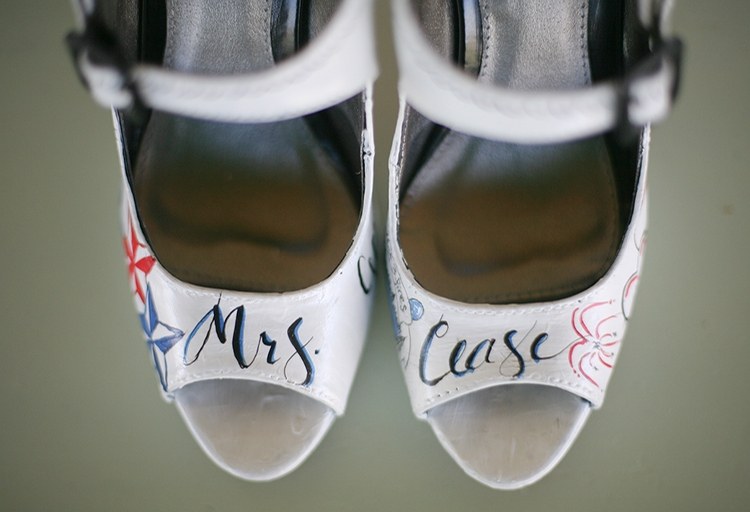
After the paint dried, I used the zig pens to draw designs around the shoes.  I included things related to us, or our wedding day.  After all the line drawing was done, I used the red and the blue to fill in and give it some color.  I added accents of some sticky rhinestones.  Once it was dry, I sprayed them with Modge Podge Spray which only took a few minutes to dry.
 
Ta DA!  New shoes! 


09-13-shoes5

09-13-shoes6

09-13-shoes7

09-13-shoes8

09-13-shoes9

I had a few pics taken of me with the shoes (then went back to flip flops cuz, damn, hard to walk in wet ground with those thing!).  I'll keep them of course, because now I have this awesome pair of shoes I can wear on our anniversary, or just for a fun night out!  They aren't perfect, but it was fun.  Took a lot longer than I expected too!
 
This project ended up costing me around $15 with new products I had to buy.  Not too bad considering that they cost $250-ish to have a pair painted for you.
 
Will I do a pair for you??
 
HELL
NO
 
Not even my sisters (love you).  If you want a pair, I suggest you brush up on your drawing skills or pop for someone else to do it for you! ;)
 
Oh, and good luck on finding those damn elusive white shoes.
 

Friday, March 30, 2012

Make your own plein air watercolor set

I've really gotten into watercolor painting and with spring here, it's fun to go outside and paint something beautiful I happen across.  However, it's kind of hard to schlep all your gear around.  The answer to this is a traveling plein air watercolor set. Plein air means "in the open air"

It's how us creative types try to feel all worldly and crap.
:p

I found a couple tutorials online on how to make your own mini plein air kit, so I thought I'd give it a shot.

Start with an altoids box (or that approximate size) and a block of white sculpting clay.  Get the brand that you can bake in your home oven.  (Fimo, sculpty, etc).  You'll also need some glue and a can of white spray paint

This altoid tin is really a blank I bought years ago to do something crafty with and never did it apparently.  I think I was going to use it for a scrapbook.

Didn't happen.

03-16-paint1

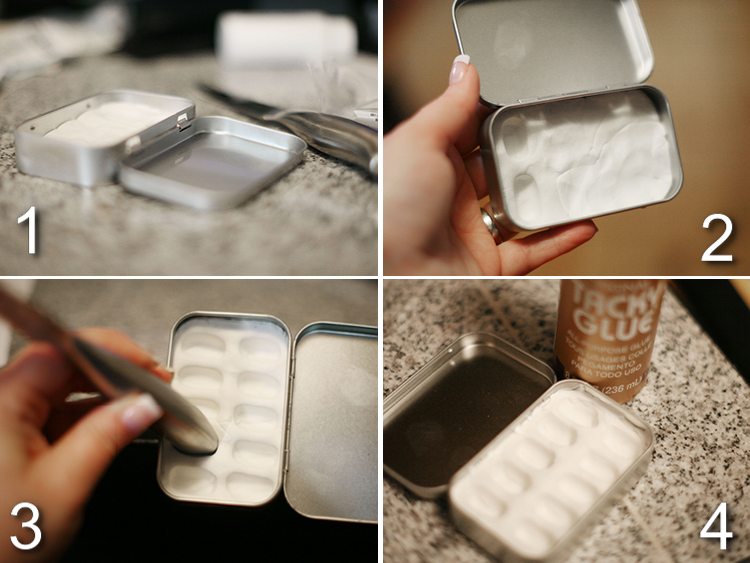
1. Normal people would probably spray paint first, but I ws anxious to get started so I just opened the fimo, worked it until it was soft and pressed it evenly in the bottom.

2. You can see where I'm starting to make some wells for my paints.

3.  I used the handle of one of my steak knives to make my wells because it was about the right size, flat on the end and "retangle-ish".  After you do all the rows, you will probably have to come back and do them again and and again as the fimo will displace and distort the other wells as you go along.  Just keep working it until you get them all even without a lot of distortion around the edges.

4.  Bake the fimo in the oven according to the directions.  I believe I baked my for 20 minutes.  After it cooled, I could see that it shrank slightly from the baking process so I used a little tacky glue as kind of "caulking" around the edges.  I didn't want water to get under it and cause rust.


03-16-paint2

You can add paints now if you like but if you haven't spray painted it yet, don't be like me and do it now.  Cover the well area and spraypaint the lid white.  You want it white so you can see if your colors are mixed to the shade you want.

Once your paint is dry, add your paints.  Leave the top open until they are dry.  You've just created a traveling holder with 10 pans of paint! (you can tell which are my cheap ones and which are the expensive ones lol)

Now I can just drop it in my purse and go.  I have this brush in my purse all the time.  I keep a little waterbucket in my glove box (which is a single serving ice cream container) so if the urge ever strikes, I can paint when I wish.

You can make these even smaller if you like.  It's almost a contest to see who can make the smallest travel set.  I saw one that fit in the cap of a water bottle - and worked!

This isn't a 100% true "trash to treasure" because it was all new materials, but find yourself some altoids (who can resist those tins?) and make your own!

Friday, December 16, 2011

Trash to Treasure - Bling Guitar!

It's been a while since I've had time for a trash to treasure!!  I have one coming up in the next couple months that might get me banned from the family.  (There's a teaser if I ever heard one).  Maybe this will save me...

Every year for Christmas, my sister Amber goes out of her way to always make me a nice gift. My nice homemade gift making skills were super lacking this year so I was wracking my brain trying to come up with something cool.

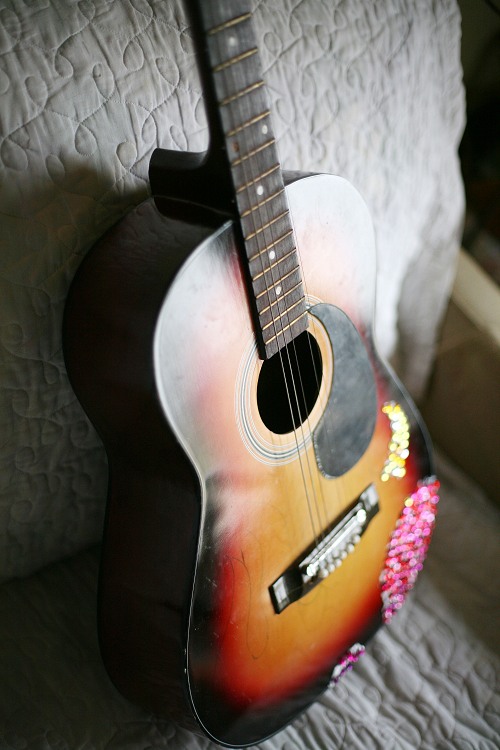
I had bought Amber a guitar at a garage sale over the summer. It was a beat up acoustic guitar that would only be good for display (her shop has a rock and roll theme). Being the horrible sister I am, I kept forgetting to give Amber the guitar and I had it for months and months.

Worked out great for me in the end, because I got to thinking, maybe I could paint something cool on the guitar or bling it out somehow.

BLING!

That was it! Immediately I went out on Amazon and bought a POUND of rhinestones. Do you know how many rhinestones are in a pound of rhinestones?

All of them.

I dragged the package into the house, ran to the store and got a bottle of
Aleene's tacky glue (hands down the best craft glue ever made) and started gluing.
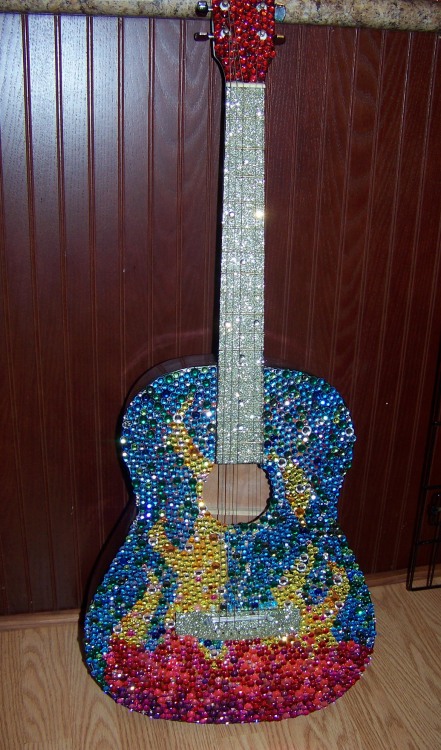
It's that easy.  I just drew on my design (which were some flames), filled in an area with glue and then stuck on the appropriate colored rhinestones. 

12-15-bling2
{I forgot to take a before pic, so here's an almost before pic}

12-15-bling
{Picture by Amber because I'm a moron and also forgot to take an after pic}
{don't be judging}
{Also don't be hatin'}

It's not nearly as hard or as time consuming as you might think. I did big portions of it when I got a phone call or needed a quick break.  Sometimes working on a couple square inches at a time.  I would guesstimate it took me approximately 3 hours to cover the whole front and the end.
After it was all done, I realized there were some gaps so I went back and filled in some of the smaller gaps with some tiny white rhinestones.  After everything was dry, I brushed on glue on the stem (is the the right name???) and covered it with Martha Stewart Agate Green Glitter because that's what I had on hand. It really is a simple project and it turned out really cool and sPaRkLy!

FYI: I doubt you'd be able to play the guitar any more, I'm sure this totally ruins it, so don't try it on your good stuff.

Difficulty - Beginner

Costs:
$2.00 - guitar
$15.00 - rhinestones
$6.00 - little white rhinestones (not required)
$1.00 - glitter (costs more for the whole bottle but that stuff goes a LONG WAY!
$2.97 - Aleene's glue

$26.97 for the whole project and I reserved my place as best sister EVAH!

My sister has the BEST SISTER!
;P

Tuesday, October 25, 2011

Trash to Treasure - Union Jack Dresser

About 2-3 weeks ago, I found this pretty cool dresser at a garage sale for not a lot of money. Very sturdy, needed love, but looked like it was probably a very nice piece of furniture at some point.

I could not decide how to revive it. I didn't want to just paint it white or blue or something uninteresting. I'd seen some dressers on better after blog that had some designs painted on the front. I wanted to paint something too! So as I lay in bed one night, I used it as an excuse to keep me awake.

It hit me...

I'd paint a union jack on the front! BRILLIANT!

How I did it, is below.


It took me about a week to do, painting 15-60 minutes at a time, then waiting for that coat to dry before moving on to the next. Definitely one of the better transformations I've made yet!

I really want to KEEP IT. hah. I'm still looking at my house and trying to figure out how I can work it in. I can do it... I can. I swear.

Please don't buy it.
;)

Friday, October 7, 2011

Trash to Treasure - chalkboard frame formerly known as Jesus

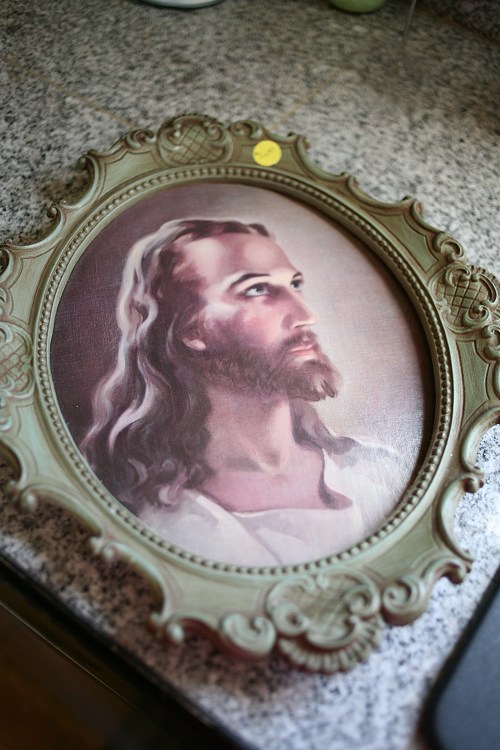
So the other day, I was at a garage sale and found this cool picture of Ashton Kutcher....


10-7-jesus1
Oh calm down.

I came to the conclusion a long time ago that God has a great sense of humor or he wouldn't have given me powers of sarcasm. Either that or I'm going to hell.

So anyway, I really liked the frame Jesus/Ashton was in, but he's not a big seller. My original plan was to toss the picture but Gene about had a fit. Said it was tantamount to burning a flag.

*scratches head*

I decided that Jesus/Ashton still had to go, but being the recycler I am, I decided instead he'd still be there looking over everyone ... like usual (except Charlie Sheen. I'm pretty sure Charlie is going to hell).... instead of tossing the pic, I'd secretly turn him into a chalkboard.

Easy peasy.


(forgive me father for I have sinned....)

10-7-jesus2
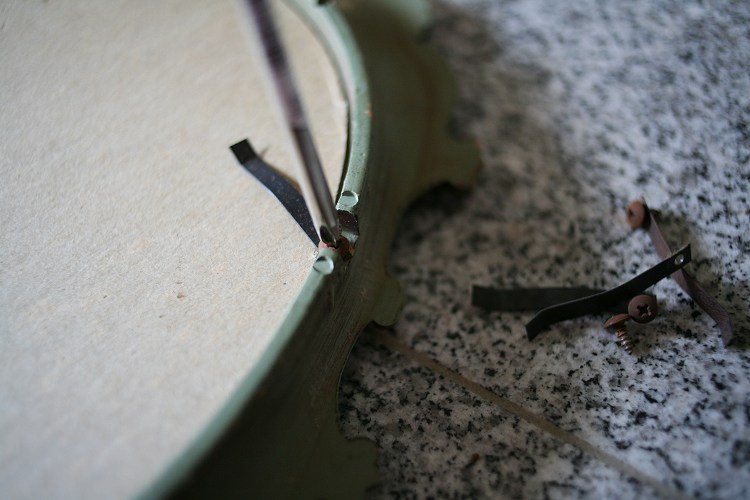
First I had to remove the weird brackets on the back to get the pic out. It was printed on a super heavy duty cardboard material that I thought would hold up well to paint.


10-7-jesus3
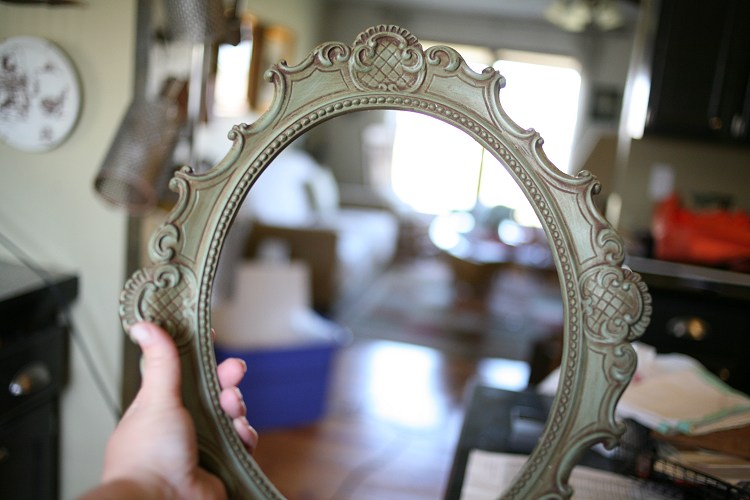
Look how purdy it frames the junk in my living room and the island that needs cleaned off!

My original intent was to paint the frame, but I really liked the color that it already was. If I were going to paint it, I would probably be my go-to turquoise blue color in which I probably should just buy a case of spray paint.


10-7-jesus4
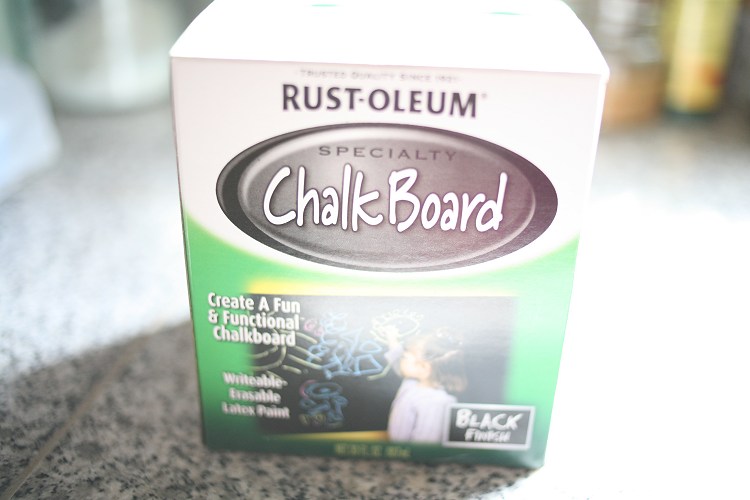
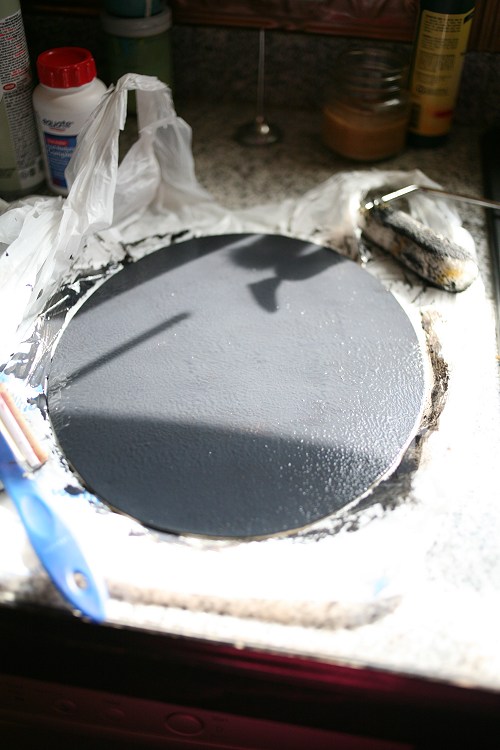
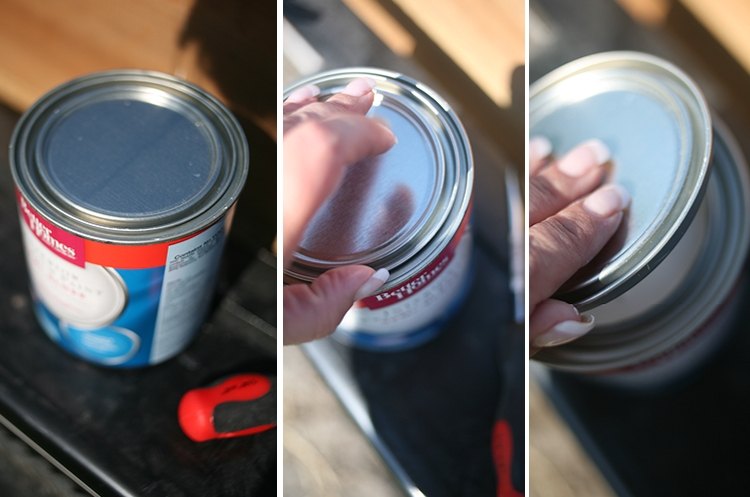
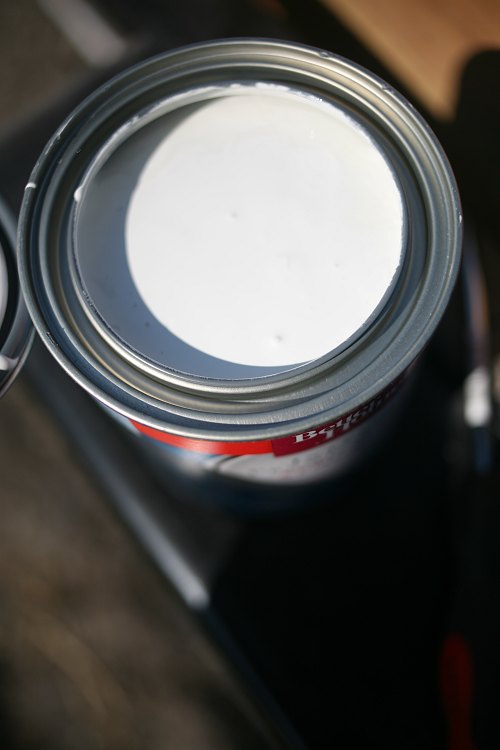
I bought a quart of chalkboard paint at the wallsmart. $9.97!! Crazy. Imagine how annoyed I was when I found out you can add some sanded grout to latex paint and it will do the exact same thing. That must be what I found in the bottom of the paint in a huge lump.


10-7-jesus5
You must use a nappy brush to paint your surface. I think that I would have been just as fine with a pad brush instead.


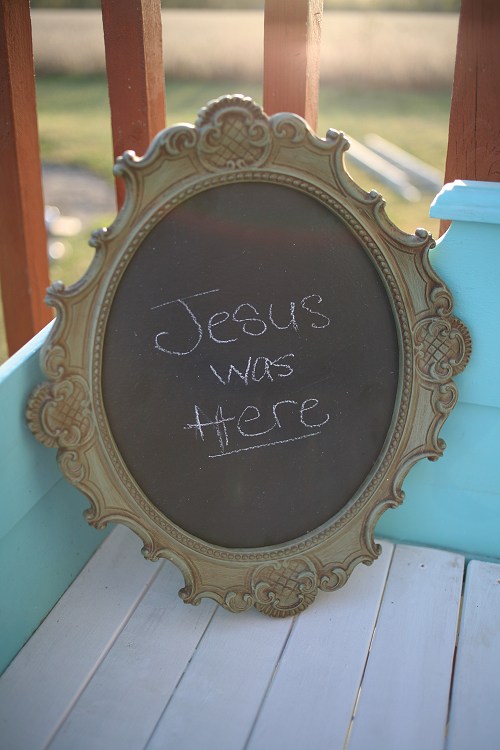
Wait for it to dry, pop the pic back in and voila!


10-7-jesus6

See how simple that was?

And Jesus/Ashton didn't have to go to the evil landfill. He also watches you from his secret cloaking device.

Always judging you.
Keeping you in line.

win win!


Frame: $1.00
Paint: $10.00 (can use on a multitude of projects, so I will call this $1.00)
chalk: .97 (I had some I'd kept for probably 5 years. Finally tossed it about a month ago. sigh.

Grand total: around $3.00
Skill level? A blind monkey could do this.... so I only had a moderate level of difficulty!

Share your trash to treasure links!

Wednesday, September 7, 2011

Trash to Treasure - Bed to Bench

I've been really into trash to treasure lately, I suppose this winter it will calm down a bit when I can't get outside for ohhh.... 6 months! sigh.

I've had this idea for a while, I've seen someone else do it and wanted to give it a shot. It's taking an old bed frame and creating a bench out of it! It's easier than it sounds, and it only takes a couple simple tools to do it.


#1. Start by finding a bed frame that's seen better days. Mine was found at a town wide garage sale for $1.00. It's a twin size, not too big, and full of potential!


#2. Next step was obvious. It had to be cleaned!! I didn't care if it was going to get wet (no pledge here) as the finish was bad, and I was going to be painting it anyway, so I just hosed it off.


#3. Primer is your friend! Don't bother these old pieces unless you use some good primer or you'll be painting over and over again.


#4. What color!??
So exciting.


#5. Spring green! Yay!! It's so springy... and.. uh... green-y.

Oh wait...
It looks like crap painted on, it really looks more like neon yellow. Blech....


#6. So I ended up with turquoise blue, which is my new go to color. Sadly I couldn't find a can of this that I loved, so I had to *mix my own*. Oh yes I did. Not only did I do it, I did it twice because I didn't have enough, and it was so close you couldn't even see my brush strokes.

Go me.

So in this step I needed to cut my foot board in half to make the side rails. First I cut it exactly in half, but realized the seat would be too deep so I re-cut it so that the sides were 19" deep. I used a simple jigsaw to cut these lines.


#7. I then screwed the sides to the ends of the headboard. It's starting to look like a bench! I ended up cutting a little bit off of the foot board sides to make them a little lower to rest your arm on. I did this with my miter saw. Ignore the dirt, at this point it's been outside for a while. LOL.

Forgive me, July was 100 deg like ... every. single. day.


#8. I then cut rails for the seat sit on. I screwed this part in from the ends. Be sure to do all of this on a flat surface. It's hard to get it nice and square out in your yard ;)


#9. Using my miter saw again, I cut a whole bunch of slats to fit across the seat. Normally I might pick something different (a solid piece or 2 long boards, etc) but I already owned this wood - so it was FREE.


#10. I had to carefully cut around the shape of the bed to make the end slats fit perfectly. I then used my palm sander (you could use just sandpaper if you wish) to sand the cut edges of the boards to keep people from getting splinters. I then just painted the sides of the boards as I figured it would go quicker that way. (it did)


#11. Shoo bee!!

All the slats are then carefully spaced (I used a nail as a spacer) and screwed from above into the cross rails. It probably would have looked better if I would have been fancier and screwed from below, but it really wasn't THAT big of a deal for me.


#12. After all the slats are down, I then painted all the flat surfaces of the seat, but it's been a long summer (this took me 3 months here and there.... no really). The blue parts went through the hail storm so it took a tiny bit of a beating. Ok, a big bit of a beating so I had some touch ups to do. I also realized I needed to reinforce some of my joints on the original bed with some super long screws!

I also needed to fill in all the screw holes. At first I wasn't going to sweat it, but there ended up being quite a few and I didn't like it, so I had to fill them!


TA DA!!
I added a few handmade pillows and it's done! I think it's really adorable how it turned out, and I believe it will end up in our antique booth. Hmm... think I can talk Gene into letting me keep it?

I also found another bed frame at a garage sale for FREE.. only it's fancier. oh la la. lol (Although, I might save it for when I get my studio though for boudoir shoots). I'm sure you'll see that one someday too.

BTW, bench for sale - chicken not included.

Friday, July 22, 2011

Trash to Treasure - Homemade China cabinet

Today's trash to treasure was kind of a happy accident. You know, when you don't plan something at all and it just sort of falls into place like you tried. The truth is, if you tried you'd fail miserably.

At least that's how it works for me.

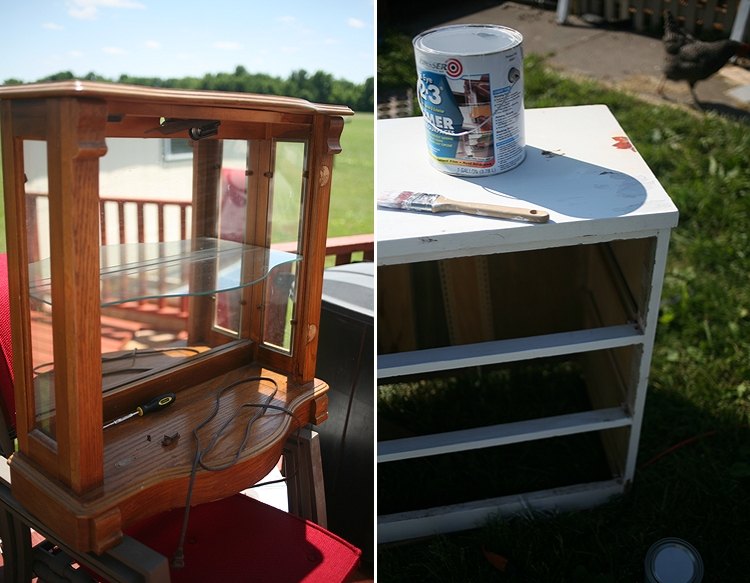
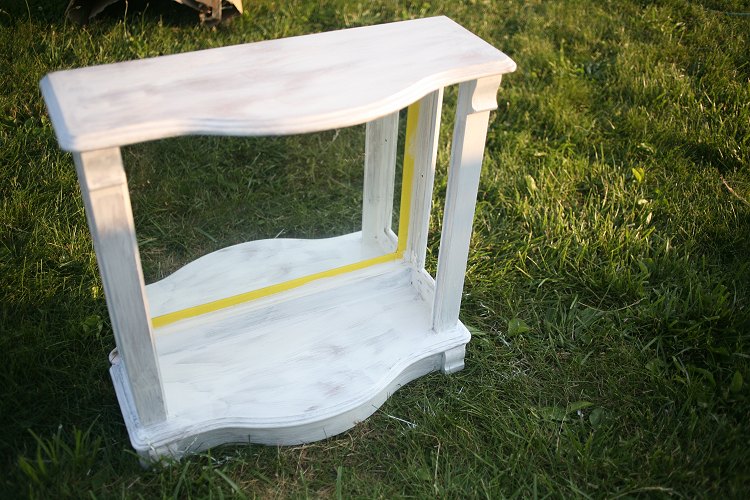
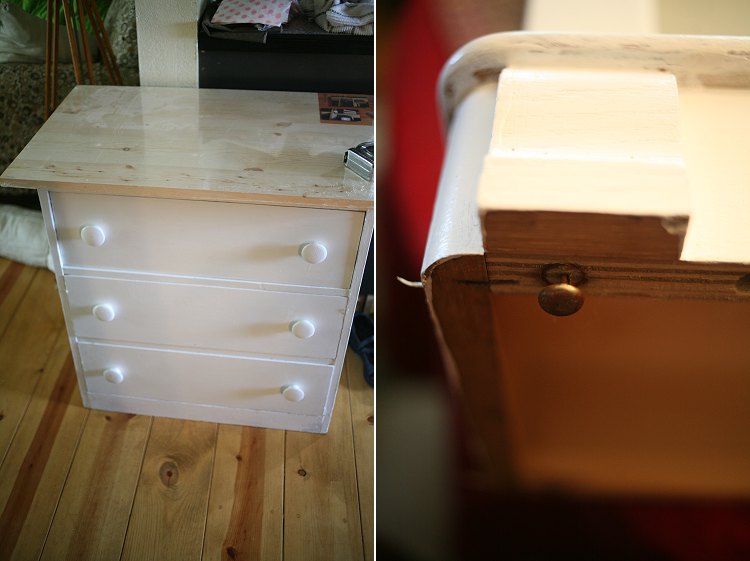
Anyway, I started by finding a cute little dresser at a garage sale for next to nothing. I decided I'd paint it a cute color and add it to our booth at the antique mall. However, I temporarily left it rough "shabby chic" style.

The next weekend, I found this little cabinet at a garage sale with a glass shelf. It needed a little love but it also, was a steal. If I would have asked, he would have given it to me for free to make it go away.


07-21-cabinet5


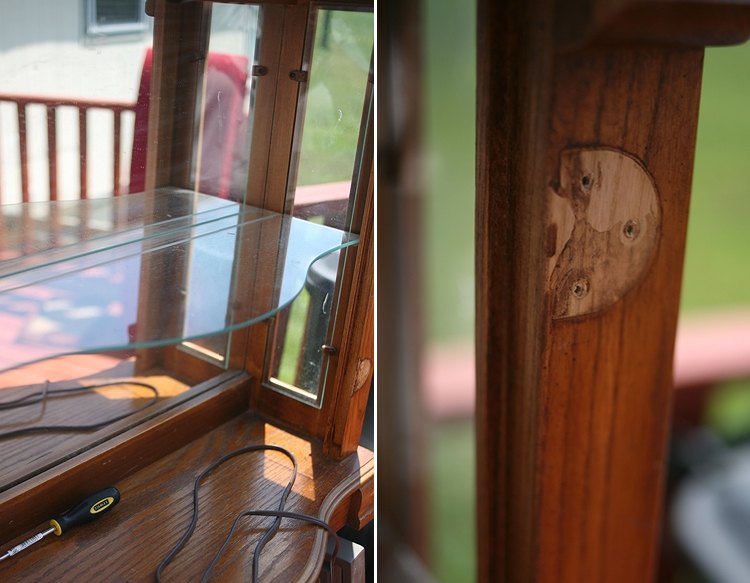
The cabinet used to have a door at one time, so there were hinge marks where it had been. My plan was to paint it and put it in our booth too. That's when I had an epiphany!

If I put the 2 pieces together, I'd have a really cute little china/knicknack hutch!

Gene thought I was nuts. Mainly because the dresser had to come back home. Oops. Sorry dear.

07-21-cabinet5b

Gene had to take the glass shelf and grind out a chip (shell) in the edge. We're lucky that he has access to this type of equipment. If you don't, just go to your local glass shop and ask if they can smooth out an ugly shell. Depending on how deep it is, they might be able to make it look better (they can't put glass back in, it'll just be ground smooth). It shouldn't cost much for them to do this for you!


I got it home and decided to paint it all one color. I was super stoked about the very unusual color I picked...

07-21-cabinet6


Wait for it!!

.
.
.
.
.
.
.
.
.
.
.
.
.
.
.
.
.
.


07-21-cabinet6b

WHITE!

Yes sorry, I am really that lame.


07-21-cabinet6b-b

There was lots of sanding, taping, filling of a few holes, priming and then FINALLY a coat of paint. Prep work kinda takes the fun out of it!

It was around this time, that I realized that the top piece, was going to be too big for the bottom piece. That through a wrench in my plan for a few weeks til I figured out a solution.
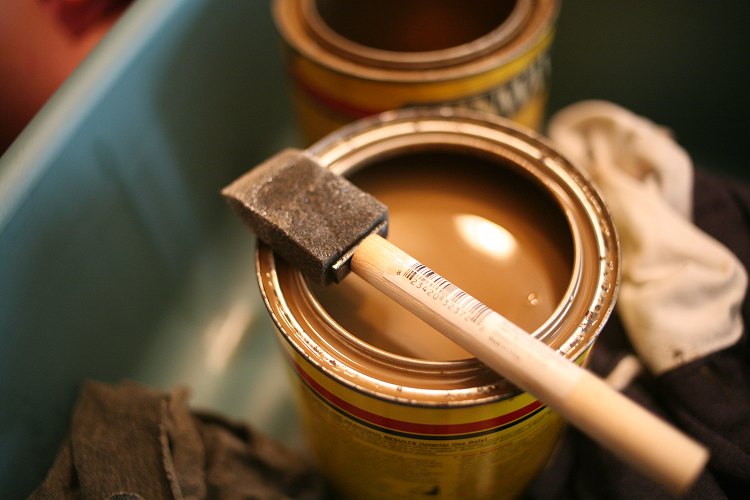
Solution came in the form of a pre-glued ponderosa pine board from Lowes. Gene cut it down for me to size.

07-21-cabinet6c

I also realized that the topper piece was not sitting flush on the bottom, so I flipped it up to remove some little nail type "feet". This gave me a chance to see all the places I missed painting (sigh).


07-21-cabinet7

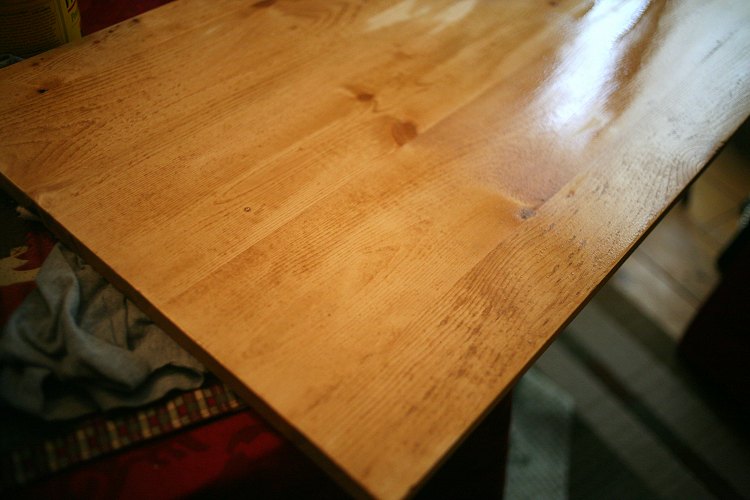
The new pine top was supposed to be painted also, but we decided it might look cooler with a two-tone look. If we hated it, it could always be painted later. We have tons of this color of stain - it's called fruitwood. It's also a real PITA. Everytime I stain something, it's a different color.

07-21-cabinet8

This time being a very acceptable golden honey color.

We then attached the top with some power grab adhesive and several finish nails set below the surface and filled with putty.

07-21-cabinet9

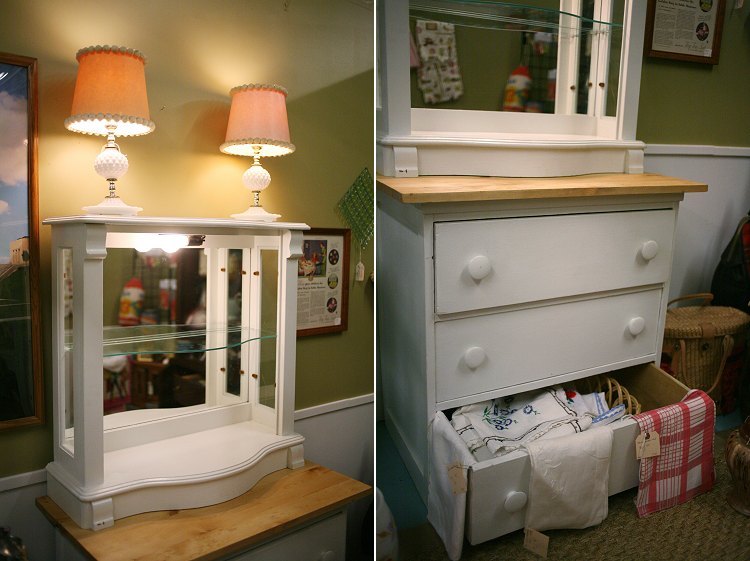
The finished product!

It immediately went to our booth (we had to do some creative arranging to make it all fit in the back of our Jeep). I kinda of forgot to take a photo before I left, oops, so I took 2 photos since I couldn't get back far enough for one.

In the end, Gene thought it was awesome, the girls all wanted it for their rooms and I decided to add a little $$ to my asking price. (it's at Kat & Company in St. Joseph if you're interested in it - #38).

Difficulty: I give it an intermediate since we had to cut a board. If you wanted to do a project like this and don't have tools, you can have them cut boards for you for a small fee in any lumberyard.

Costs:

$1.00 - Top cabinet
$3.00 - Bottom Cabinet
$15.00 - board for new top
$3.00 - paint (was $10 but plenty left for muliple projects)

$22.00 - total cost!

I think this would be so cute for a little girls room for her collection of ponies or something cute! It would also be nice for a small collection, in a house that may not have a lot of room for a traditional china hutch.

Share your trash to treasure links too!

Related Posts with Thumbnails