
Our very sophisticated eyes are great at judging what is white under different light sources, but cameras often have difficulty with this process creating blue, orange, or even green color casts. This is difficult to correct AFTER the fact (trust me), so lets try to fix it ahead of time by setting a custom white balance. It's easy!
Gene and I went to a nice restaurant at the plaza in KC over the weekend. I usually take my camera as I like to grab a pic of the fancy foods. It was 8 p.m. and the light was almost gone for the evening so I shot under their incandescent lights. Incandescents have a tendency to make digital images very yellow/orange if you don't set your custom white balance.
This is the first image I got by using AWB (auto white balance):

This is a straight out of the camera shot. It's horrible and should be tossed in the trash. I have "rescued" photos like this before when desperate, but they never really look just right.
There are settings on your camera that will do this automatically by just selecting cloudy day, tungsten lights, flash, etc. Incandescent light function, however, never seems to be "just right". This is when I will use a custom white balance.
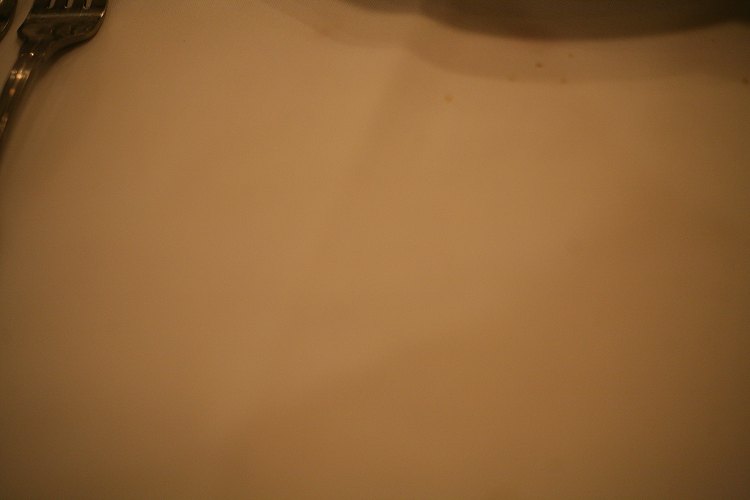
I realize that I have a big white tablecloth in front of me, so I can use it to set my white balance easily. Using AWB, I take a photo of the tablecloth to use when I set my custom white balance.
The after photo:

Except for it being a little out of focus (I was shooting at 1/13 of a second), it's a million times better. This is also a straight out of the camera shot.
If you pay close attention in the before and after, look at the windows behind Gene. There is natural light coming in the windows behind him. In the top photo it looks very natural, and in the bottom photo the windows are very blue. That's because the camera is pumping a LOT of blue into the photo to make up for the yellow lights.
In a mixed lighting situation, you either have to live with this, or fix it in post processing. Because this is just a personal photo of us, I probably wouldn't bother to fix it. If it was someone's wedding photo, I might mask out that area in photoshop and put a little bit of yellow back over it.
You can buy cards that you can carry in your purse, pocket or on a lanyard around your neck to help set your white balance (they'll be white and 18% gray), but I usually end up finding something white on my own and setting my white balance with that as it gets me pretty darn close to where I need to be.
Think that you don't have a DSLR so you're fine? The truth is, that even cheap point and shoot cameras have a white balance setting on their menu. Yes, you will probably need to look at your manual. Lost your manual (like I always do)?? Google the name of your camera, model number, and "manual" and you'll probably be able to find that information as a pdf file online!
If you'd like to learn more about white balance, you can get much more technical information and explanation here.
More technical info on white balance.


No comments:
Post a Comment