
In my head, I said "I can do that!" and realized later, that there are a couple simple things that can make a sunrise look even better.
Below are 3 samples.

{#1, ISO200, F4, 1/4000th}
{#2, ISO200, F4, 1/500th}

{#3, ISO200, F4, 1/125th}
Now, something you should know, is that these three photos were taken within 1 minute of each other. No, there was not a quick shift in the light. I only did one little thing different.
I'm sure you can see, that the first photo, the shutter was open the least amount of time at 1/4000th of a second, the second at 1/500th of a second and the third the longest at 1/125th of a second.
Now, you could just manually set your camera to each increment until you get the look that you want. I'm entirely more lazy than that. LOL.
I do the easy way. First, I ALWAYS set my focus point to the center. I will point at the point I want to focus and recompose my shot. This is also the point where your camera will meter for the light.
So essentially, if you want a dark moody photo, pick a light spot and meter for that spot. {I metered for the sun in the photo#1} That will force the shutter to open and close fastest letting in the least amount of light to expose the rest of the photo, this will make your darker parts of the photo, darker than in real life. This might be the dramatic look that you're looking for.
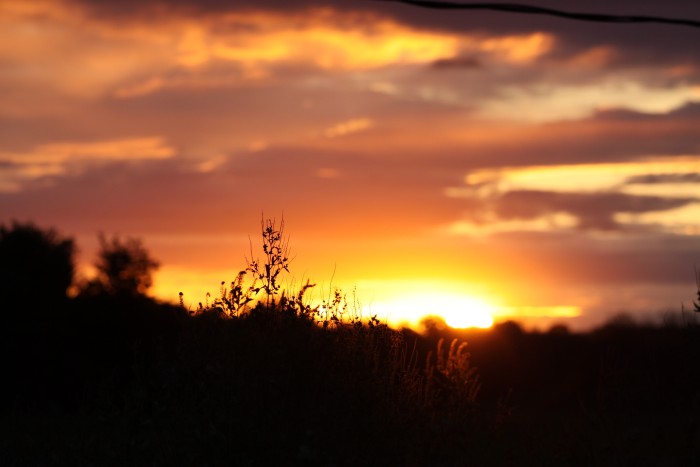
If you want your photo to be bright, or you want to see the details in a darker area of photo, point, focus/meter off of the darkest areas {photo #3, I metered the trees}
I prefered something in between, that felt like what the real sunset was like, so I might pick something of a medium light or tone to meter off of, like a cloud or the edge of the tree line.
This method works best for a landscape photo where you are focusing on infinity. If you are wanting to focus on one thing, but meter for another, then you should expose for part that you'd like to meter for, pay attention to what your readings are in your camera and go into manual mode, THEN focus on the closer item.
This makes no sense if you're not using a DSLR. This CAN work if you're using a point and shoot to a certain extent. If you want more dramatic skies, point more towards the sky, if you want lighter sky, try to point more towards the skyline. If this doesn't work for the composition of the photo, you can crop the photo in your photo editing programs at home, or if your just uploading to a photo processor, they always allow you to crop with their software.
Hopefully this will help your photos when you take us to the bahamas this January!
Anyone?
Hello?


1 comment:
Yep, it was Heather! Thanks again for all the helpful info!
Post a Comment